Attribute Binding
- Attribute binding is used to bind an attribute property of a view element and used where we don’t have any property view with respect to an HTML element attribute.
- Attribute binding starts with the prefix
attr, followed by a dot (.), and the name of the attribute. eg[attr.colspan] NgIfconditionally creates or destroys subviews from the template.NgForrepeat a node for each item in a list.
Write the below code in app.component.html
<div>
    <table>
        <thead>
            <tr>
                <th [attr.colspan]="4">Welcome to Angular Binding</th>
            </tr>
        </thead>
        <tr>
            <td>Interpolation</td>
            <td>Property Binding</td>
            <td>Event Binding</td>
            <td>Two Way Binding</td>
        </tr>
        <tr>
            <td>Curly Brackets</td>
            <td>Square Brackets</td>
            <td>Round Brackets</td>
            <td>Banana in a Box</td>
        </tr>
    </table>
</div>
<div>
<table>
    <thead>
        <tr>
            <th>Name</th>
            <th>Designation</th>
            <th>City</th>
        </tr>
    </thead>
    <tbody>
        <tr *ngFor='let person of persons'>
            <td>{{person.name}}</td>
            <td>{{person.designation}}</td>
            <td>{{person.city}}</td>
        </tr>
        <tr *ngIf="!persons || persons.length==0">
            <td [attr.colspan]= 'colspan'>
                No persons to display
            </td>
        </tr>
    </tbody>
</table>
</div>
Write the below code in app.component.ts
import { Component, OnInit } from '@angular/core';
@Component({
  selector: 'app-employee',
  templateUrl: './employee.component.html',
  styleUrls: ['./employee.component.css']
})
export class EmployeeComponent implements OnInit {
  colspan: number = 3;
  persons: any[] = [{
    name: "Sanjay",
    designation:"CTO" ,
    city: "Hyd"
 },
 {
    name: "Ramesh",
    designation:"AVP" ,
    city: "Vizag"
 },
 {
    name: "Ganesh",
    designation:"CIO" ,
    city: "Bangalore"
 }
];
}
Add the below code to app.component.css
table {
color: #369;
font-family: Arial, Helvetica, sans-serif;
font-size: large;
border-collapse: collapse;
}
td {
border: 1px solid black;
}
thead{
border: 1px solid black;
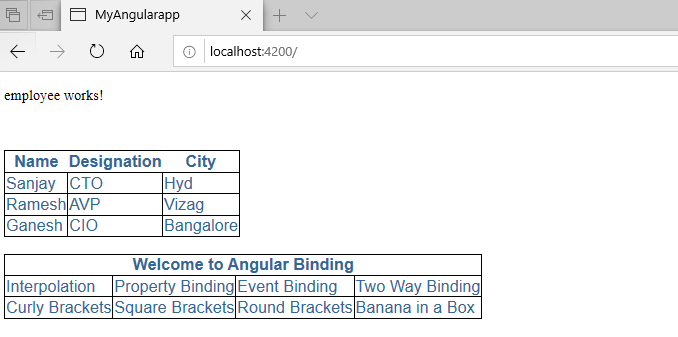
}When you run the code, you will see the below similar screen
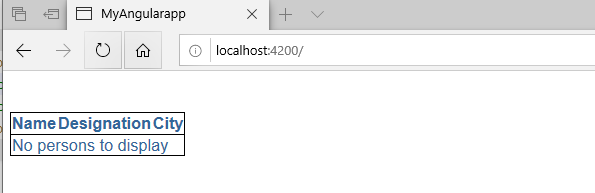
If we don’t have any persons data, it will display as below
Event Binding
- Event binding allows you to listen for certain events such as keystrokes, mouse movements, clicks, and touches.
- Event binding syntax consists of a target event name within parentheses on the left of an equal sign, and a quoted template statement on the right.
Write the below code in app.component.ts
import { Component } from '@angular/core';

@Component({
  selector: 'app-root',
  templateUrl: './app.component.html',
  styleUrls: ['./app.component.css']
})
export class AppComponent {
onClick(): void {
      console.log('Button Clicked');
  }

}
Write the below code in app.component.html
<h1>{{"Event Binding"}}</h1>
<div><button (click)="onClick()">Click me</button></div>
<div><button on-click="onClick()">Click me on-click binding</button></div>
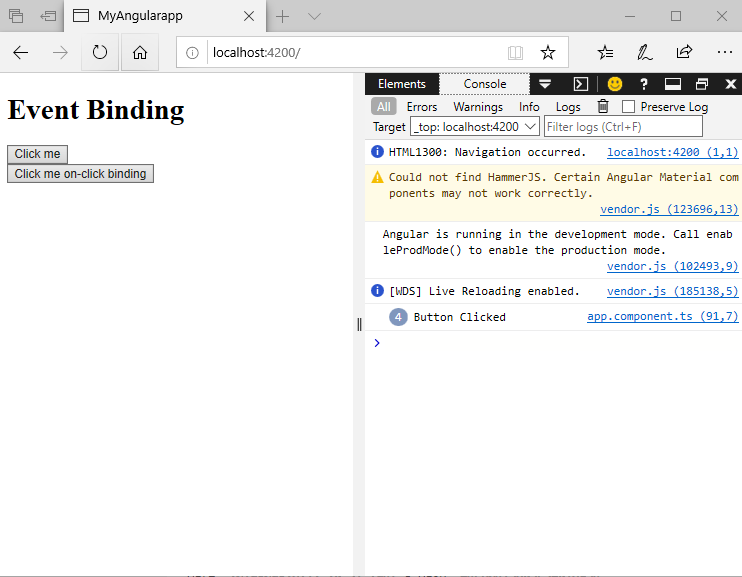
<br/>Once you run the code, you can see the below similar screen. You can see the Button Clicked count increase when you click on the button on the debugger console. Press F12 key, to open the debugger window.
Two Way Binding
- Two-way binding gives your app a way to share data between a component class and its template.
- Two-way binding does two things
- Sets a specific element property.
- Listens for an element change event.
- The
[()]syntax combines the brackets ofproperty binding, [],with the parentheses ofevent binding, ()
Write the below code in app.component.ts
import { Component } from '@angular/core';

@Component({
  selector: 'app-root',
  templateUrl: './app.component.html',
  styleUrls: ['./app.component.css']
})
export class AppComponent {

  name: string = 'Govind';
  name1: string = 'Girish';
  name2: string = 'Chandra';
  name3: string = 'Sanjay';

}
Write the below code in app.component.html
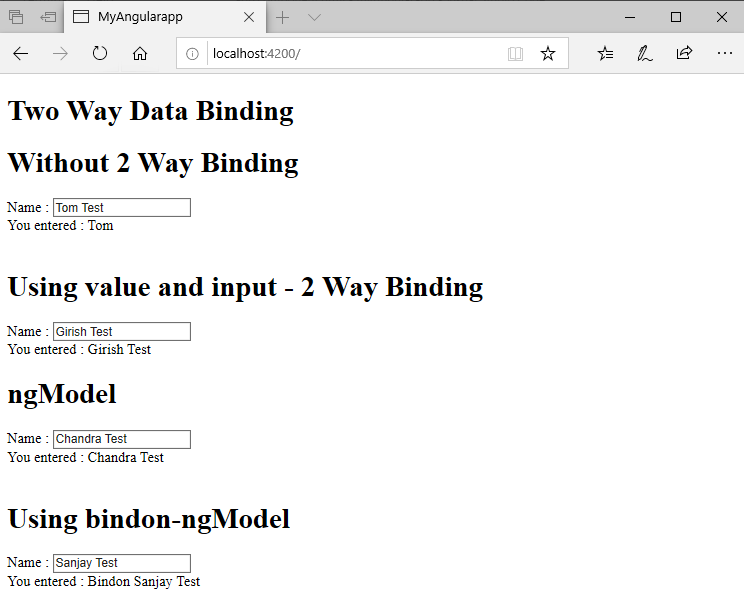
<h1>{{"Two Way Data Binding"}}</h1>

<h1>Without 2 Way Binding</h1>
<div>
  Name : <input [value]='name'>
  <br>
  You entered : {{name}}
</div>

<br />
<h1>Using value and input - 2 Way Binding</h1>

<div>
  Name : <input [value]='name1' (input)='name1 = $event.target.value'>
  <br>
  You entered : {{name1}}
</div>

<h1>{{"ngModel"}}</h1>
<div>Name : <input [(ngModel)]='name2'>
  <br> You entered : {{name2}}
</div>
<br />
<h1>{{"Using bindon-ngModel"}}</h1>

<div>Name : <input bindon-ngModel='name3'>
  <br> You entered : Bindon {{name3}}
</div>
Once you run the code, you can see the similar below screen
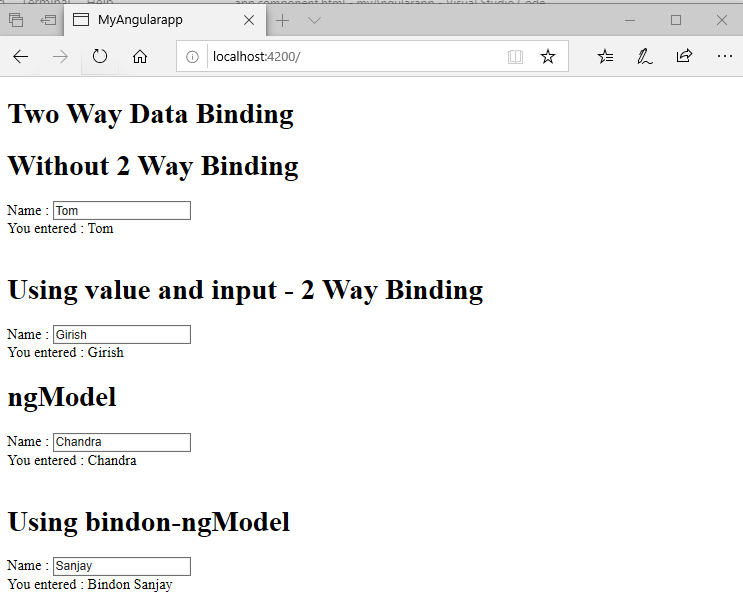
Try entering some values and observe the data updating in real time as shown below.
References
- https://angular.io/guide/template-syntax#attribute-binding
- https://angular.io/guide/template-syntax#event-binding-event
- https://angular.io/guide/template-syntax#two-way-binding-
Learn more about Angular features in the upcoming Angular Blog articles.
Happy Learning!